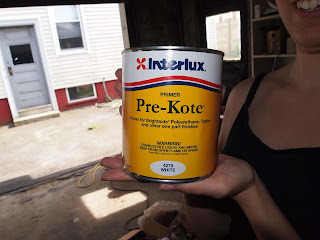
Painting the roof and hatch was one of the most
exciting/nerve racking portions of the trailer build to date. This was mostly because at this point we were
in the second week of July and still had a laundry list of tasks to get done
that couldn’t even be started until the paint was dry! After a lot of research, we decided to use boat
paint to seal and protect the ¼” plywood skin.
There were a number of different brands to choose from, some of which
were over $150 a can! We chose a more
middle of the road brand called Interlux and purchased a quart of Pre-Kote
primer and a quart of Brightside polyurethane paint in “Seattle Gray”. The Brightside paint is what is considered a
topside boat paint meaning that it is meant for the upper part of a boat that
is above the waterline. It will protect
the wood from water and sun damage and should hopefully last quite a few years
before it needs to be touched up or re-done.
After everything was protected and sanded down it was
time to start with the primer. To apply
the paint we used foam rollers. The
primer was rather thick but the plywood really soaked up the first coat so we
ended up doing two to make sure everything was covered. In between coats (we waited 8 hours before
the second coat) we sanded it down with 220 grit sand paper and then carefully
wiped all of the dust off.
We followed the same process with the topside paint,
using a foam roller for application and waiting 8 hours between coats. The topside paint was much thinner than the
primer and after three thin, even coats, we still had quite a bit of paint left
over! It was recommended to ‘tip off’
the paint with a good quality paint brush to smooth out the finish. However the paint has auto leveling
properties to it and we found trying to ‘tip off’ created more marks then just
using the roller.
 |
| After the first coat |
One thing we did notice about the paint was that it
actually dried pretty fast! This was a
bit of a challenge with using the roller.
Since we were painting in small sections, the front first and then the
roof, if we waited too long the paint would start to dry on the front and
become slightly tacky, leaving subtle marks where we matched up the paint. This just meant that we had to try and paint
as fast as we could!
The final result was better than we could have
imagined. The finish was shiny and hard
best of all, waterproof! The color was a
bit whiter than I wanted, but it looks great against the dark wood. Now we can finally install the solar panels,
tongue box, and trim!
 |
| So shiny!! |
Note: So as you might have been able to guess from the batch posts... we are actually on the road and done with the trailer!!! The last two weeks of the build were crazy busy with trying to finish the trailer, pack and move out of our apartment and finish planning. But I'm doing my best to finish writing these up as quickly as I can so we can start posting where we are and the FINAL photos. So far the trailer has been working out amazing and I can't wait to share our adventures :)


No comments:
Post a Comment