June 7, 2012

Finishing out the Galley

The galley was finally beginning to take shape with the addition of the shelf and stove drawer we added here.  But we still had a bunch more details to add before we were done.

One major amenity we wanted to add was a sink with a hand pump faucet.  This would be a simple setup for washing dishes and cooking because doing dishes at a campsite is currently one of my least favorite things to do.  We ended up selecting a smallish (8" x 13") oval sink and a slick hand pump faucet online.  We figured by having a hand pump type of faucet we would not only conserve water but it would also be far simpler to install versus having a 'real' faucet with an electric pump.  Plus it would save on electric consumption too!

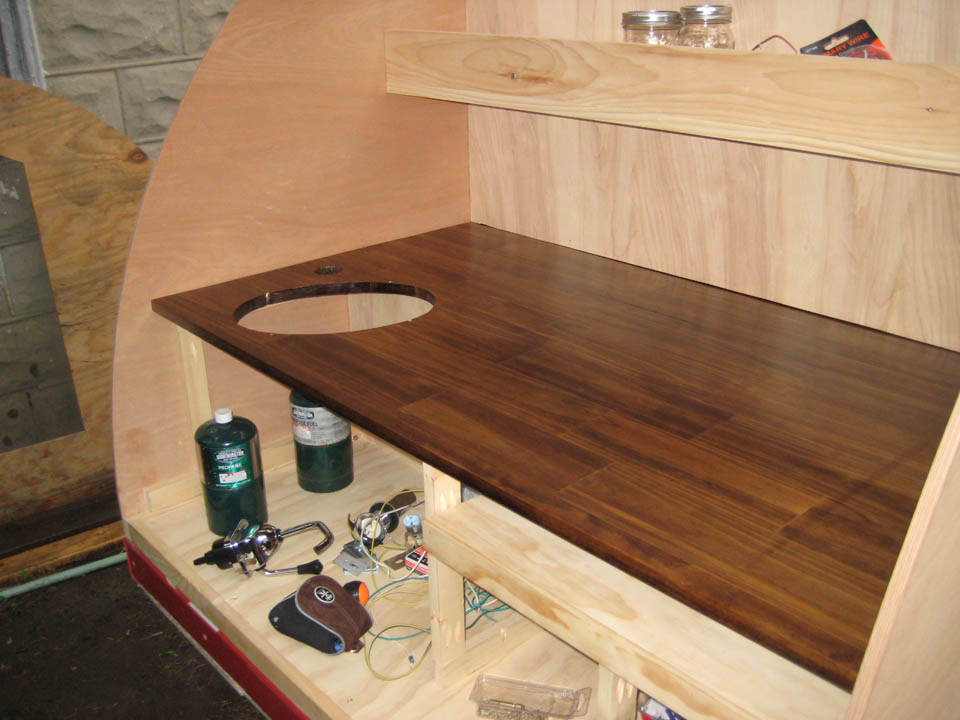
Before cutting into the counter top, we laid out the position of the sink and faucet (up until now, the counter top sill hasn't been permanently installed in the trailer).  We decided on an angled approach to the layout to save on counter space when the stove is pulled out.  We also had to position them in such a way that a container could fit under the counter to hold water.  After tracing everything out, I used the jig saw to make the sink opening and the drill to cut out the faucet hole.  A test fit showed how awesome it looked!


The next step before permanently installing the counter in the trailer was to stain and polyurethane it.  This created a beautiful and more durable surface for us to cook on, it is a galley after all!  The whole process took a couple of days to complete, but it was worth the wait.  The wood we used for the counter really soaked up the stain so all I had to do was one coat, but I didn't end up wiping any of it off.  That made it go much faster.  After the stain dried, we followed the instruction on the polyurethane and used three coats, sanding with fine 150 grit sandpaper in between each coat.  We tried to be careful not to get anything stuck to the poly but would you believe we still found cat hair embedded in the poly after the fact! How did it get outside?  I guess it adds character :)


so shiny!

We finally installed the counter in the trailer using some small brackets that Darrell found laying around at work.  These allowed us to anchor the counter in multiple locations while keeping all of the fasteners hidden within the cabinets.  With the counter in, the faucet got installed with some caulk and a couple of screws.  The sink is still temporarily in until we finalize the drain.  Unfortunately there were still a few gaps around the counter and at the wall between the galley and the cabin.  To cover them up we bought some small cove moulding and after staining and polying the strips, we nailed them in.  Big improvement!


it works! now we just need water...


To finish out the cabinets, Darrell used some 3/8"x2" pine strips to create face frames for all of the cabinets.  He used a miter box we got at Home Depot to cut all of the corners and give it a more finished loot.  They were then attached with glue and some finish nails.


After the face frames were done, I got to work cutting doors out of 1/2" birch veneer plywood.  The only challenge to the doors was aligning them in the frame.  We used self-closing hinges and once they were screwed on, the door had a tendency to sag even with all or our aligning efforts.  Darrell ended up using some magnets to keep the doors closed and that helped with the alignment.


Things came out great!  We'll end up using tung oil on the bare wood later on to seal and protect things, but for now the galley is complete!

Electrical Setup and Wiring

In the last post I worked out what our electrical usage would be based on the fixtures we would be installing and things we might be plugging in.  From this we determined we would be using two 20 watt solar panels that would be mounted on the trailer roof.  The electricity generated from the panels would then be 'stored' in a deep cycle marine battery which we still have to purchase - we just need to figure out which one. 

The power coming out of the battery is D/C current so we made sure that all of the fixtures (lights and fan) could run off of this without needing to be converted.  We also decided to keep things simple by installing 2 auxiliary ports in the trailer, one inside the sleeping quarters, the other in the galley.  These ports are the same type you would have in your car (the cigarette lighter type).  With these we can power most of our auxiliary equipment (e-reader, cell phone, laptop, etc.) with either a lighter plug or with a special inverter like this:

auxiliary inverter
installed auxiliary port in the galley

I also had to accommodate for the trailer running lights as well since they would be running off of the a plug attached to the car at the hitch.  What is nice about this is that there are numerous resources online to help you with trailer wiring.  There are also complete wiring kits for the brake lights you could purchase to make things even easier - ours came with the trailer frame we bought at Harbor Freight, so we saved the wires.  In a standard trailer like ours, we have 4 wires that run everything (break lights, turn signals, side marker lights, etc.), in our case these are Yellow, Brown, and Green.

I then decided on the color code of wiring to use throughout the rest of the trailer.  I decided to use red and white for all of the 12 Volt wiring as this is what I have seen in the past on cars and trucks. red would be the "hot/positive" and white would be the the "ground/negative".  All wiring is 16 gauge which is a bit overkill since the voltage and amperage on each item is so low, but I figured since we would never see the wires again after the roof was skinned, better safe than sorry.  I utilized about 200 ft of each color on the whole trailer since everything is running from each item back to where the fuse box will be in the tongue box (in both colors).  The last thing we wanted was another ground issue like we had with our first wiring job!

Simple Wiring Diagram

To feed all of the wires, I drilled holes on each side of the trailer through the center of each spar.  This acted as my wire chase to go to any place I would need within the trailer.  Normally I would have put these wires through the walls and on the underside of the trailer, but since we already buttoned up everything, this was the easiest method.  However, since we had yet to finish skinning the wall between the cabin and the galley, I was able to run wires for both auxiliary ports in this area by shaving away at the insulation to embed the wires.  That way they will be hidden when we finish the wall.

 
After all the wiring was installed, I checked the impedance of each wire group by connecting one end together (white to red) and testing the circuit with an ohm meter on the other.  This ensured that there were no tears in the shielding or breaks in the wire.  I should also mention that I labeled each wire group with the name of the fixture/outlet it was going to so we could keep track of everything - I cannot stress this step enough!!

note the explosion of wires

The galley hatch was a bit harder in the fact that we wanted to make it removable even after the trailer was completed.  To do this I added connectors at the hinge section so that we could literally 'unplug' the hatch before taking it off.  The wiring on the hatch was a bit easier in the fact that most of the were from the trailer wiring (break lights, license plate light, turn signals).  One thing I also did was to combine all of the ground wires from each light to a terminal block.  This meant that we would only need one white/ground wire back to the hitch connection.  The one item to tie back to the fuse box was the light for the galley.

running ground wires to the terminal block


While all this wiring was going on, we decided to install the lights we purchased for the cabin.  We located and installed these, pulling the two wires through the wall and attached them to the wiring I had already run.


Getting all the wiring done took a lot of prep work and thinking though, but will definitely make the trailer a more comfortable home for our travels.  Now we just need to get the fuse box and solar panels figured out!

May 23, 2012

Electrical Calculations and Design

Throughout this whole trailer build, we always wanted to build this thing "off the grid."  In other words, we wanted to have some of the conveniences of the world (lights/plugs/chargers/etc.) but didn't want to have to plug in anywhere.  So with some research we decided that solar would be the way to go.

The design of this system is actually quite easy.  Utilizing solar panels you "trickle charge" your battery as it is depleted and can do this with a solar charge controller.  What the controller does is it charges the battery and then cuts off the solar power when the battery is fully charged.  Think of it as a computer for your battery - it's "smart!"

Before purchasing anything, I first had to determine exactly what we would be powering so we would know what wattage of solar array we would need.  This meant we had to research and decide on all of the fixtures we wanted for the trailer so we could input their wattages into our calculations.  GAH!  After we gathered all the info I used the following method to calculate our potential electric consumption:


This is consumption over a period of 1 weeks time (typical method of calculating solar capacity)

To determine watt hours = (Watts x hours per day use) / 5 hrs [5 is the typical peak charging time available during a normal sunny day.]

Devices and Data 
12VDC Light (cabin)   10Watts     0.83Amps     6hrs/day use     = 12Watt hours
12VDC Light (cabin)   10Watts     0.83Amps     6hrs/day use     = 12Watt hours
12VDC Galley Light    10Watts     0.83Amps     6hrs/day use     = 12Watt hours
12VDC Fan (cabin)     20Watts     0.5Amps      6hrs/day use      = 24Watt hours
Laptop (AC voltage)    180Watts   1.5Amps      5hrs/day use      = 180Watt hours

Total = 240Watt hours / Day
Total = 1680Watt hours / Week

If we work through and determine what wattage of solar array we need we utilize the same technique, we finally decided on two 20 watt solar panels which we got from Northern Arizona Wind & Sun.

40 watts x 7 days per week x 5 hours per day of charging time = 1400 watt hours/week

Even though these numbers don’t match (1400 watt hours vs. 1680 watt hours needed) we decided that it would suffice, not only based on the cost of the panels but also on the sizes.  We only had a certain amount of space on the roof for the panels and any panels we found with a higher wattage output were too large.  This will just mean we have to be a little more careful with how much electricity we use and "rough it" a bit more.

Whew!  I know that was a lot of math (and a lot of words) but it gives you an idea of how to calculate out the size of a potential solar array on any of your future projects!  And because posts without pictures are boring, here is a photo of me in the midst of wiring which I will go into on the next post!


May 21, 2012

Shelves & Stoves

When we last left the galley, we had planned out the kitchen, framed and insulated the interior walls, and built the counter.  The next step was to frame out some lower cabinets and upper shelving.  I started with the upper shelf since that was the easiest.  We had already selected some air tight containers for our food storage, so we wanted to make sure the shelf was large enough for them.  After some quick measurements and a few pocket holes later, we had a shelf!  When we framed the back wall, we had taken into account the height of the shelf, so that it could be screwed directly into the wall with no problems. 


Next up was a pull out shelf for the stove.  We bought a really simple two burner stove from Bass Pro Shops which was just large enough for what we wanted but still small enough to not take up too much space.  We used the same 1x2 pine we've been using everywhere to frame up a side wall and some supports for the brackets.  The brackets were actually some heavy duty drawer slides we found in the garage.  They had obviously been there for many years, but by adding a bit of grease and cleaning them up, they worked great!


The drawer will be covered with some aluminum or something similar to protect the wood from the heat of the stove - which also needs to be more permanently attached as well - but for now it looks awesome!

awesome!

The Galley Hatch - Skinning and Trim

With the galley hatch all framed up, I proceeded to work out how to skin the frame.  Since we did the interior of the trailer, we learned a few tricks to make our lives easier.

#1 - wet the plywood down, I cannot stress this enough!
#2 - have plenty of straps to help hold the skin in place and bend it SLOWLY, the ratcheting type works best as you can slowly bring the skin down into shape.
#3 - have lots of clamps and/or weights to keep everything in place as the plywood starts to dry.
#4 - have everything ready to screw the plywood down as it will tend to spring back after it dries.

I started out by cutting a sheet a bit longer than needed to accommodate for any modifications that might be needed after bending it into its final shape.  I aligned the top edge of the plywood with what would be the top of the galley hatch and secured it with clamps.  After this I wrapped three straps around the frame and plywood and tightened them down without actually bending the plywood.  Then we took everything outside and wet it down completely.  Finally we slowly ratcheted the straps down until the skin was almost tight to the frame.


After the skin plywood dried a bit, I centered the skin a bit more carefully on the frame and screwed everything down.  I didn't fully countersink the screws yet as we were still unsure how the wiring would go and what the final finish would be.  But the skin was secure enough to work and when everything dried out I removed the ratchet straps and it was done!


I next started working on attaching the hinge permanently to the hatch as this would aid in holding the skin as well as give me a better idea of how I'm going to work out the final trim.  I first cut a strip of aluminum wide enough to fit under the hinge and then bend over the exposed plywood frame.  This trim piece protects the frame and will give the hatch a more finished look.  I attached the aluminum with a few finish nails and then screwed the hinge in place.  This is mostly how we're thinking of doing all of the trim on the hatch.


I called it a day after this and put the hatch back onto the trailer.  We are liking the ability we have of being able to take the hatch on and off - this is something to think about when we get to the wiring.

May 3, 2012

The Galley Hatch - Beginning


Since we began this project the one item that has been the bane of our existence was the galley hatch. We had read other blogs about teardrop trailers and it seems to be the consensus that this is one of those “dreaded sections of the build” for everyone. Needless to say we were slightly worried.

We decided that our hatch would recess into the side-walls. There are many ways of doing this, but this seemed the easiest and least painful method without cutting anymore into the exterior walls.  This recessed detail is illustrated below.


To do the hatch frame I first began with some rather cheap ½” plywood, since the spars of the hatch will never be seen (we decided after the fame was built, to cover the exposed spars with aluminum trim), this was the easiest way to go, however there were draw-backs. Cheaper plywood has less strength than more expensive kinds, which meant we had to double up on the spars.

I began creating a cardboard template of the spar.  Each spar would be 1½” deep to match the 1x2 oak and pine framing members we used throughout the trailer.  I then used the template to trace out the spars and cut them out with the jig saw.

 
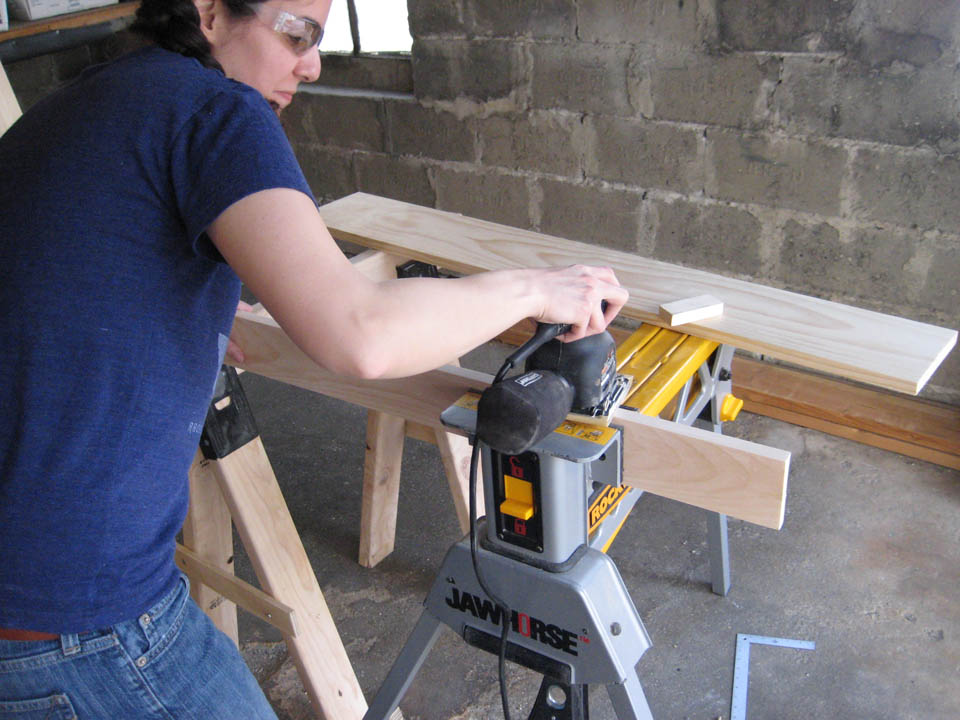
After cutting two spars out of the plywood, I glued and screwed them together to form a double spar.  This strengthened each one substantially. I clamped all of the completed arced spars together and let them dry and straighten overnight. After they were cured I sanded them down while they were still clamped together to get a more uniform shape - jig saws unfortunately don't make perfect cuts no matter how hard you try!


Next I worked on creating the entire hatch. I cut out each upper and lower full spars. I then attached the outer two arced spars and created a sort of box. We decided to use 1x3 oak for extra rigidity just like we did with the cabin.


I test-fit this box on the trailer using a 'leakproof' galley hinge that we purchased from Lil' Bear Tag-Alongs. Things fit rather well, it still needed additional spars to stiffen it up but it was beginning to look like a hatch!


Ta Da!  It works!

I attached the inner spars with blocking on each upper and lower full spars. I decided to use blocking since it would be a rather weak connection if I were to just screw into the end grain of each arced spar.


The hardest part of this method was keeping the entire frame square. I managed to accomplish this by pinning the frame between nails which I pounded with a hammer into the garage concrete. It worked out really well and when I assembled the frame everything was pretty much square!

Another dry-fit on the trailer and things seamed to be working out well. I think it will stiffen up even more once the skin is on each side of the hatch.

Its hard to see, but there are nails in the floor to help keep things square
 

Fits like a glove!
 Next up skinning the hatch…