July 11, 2012

Hatch Updates

With the exterior now fully skinned, it was time to re-install the hurricane hinge for the hatch, add some lighting and hardware.  The plywood skin is only held onto the last spar with five screws so the end became a bit wavy looking as it dried.  However, the hinge is held in place quite a few more screws so we wern't too concerned. 


With the hinge installed, we were able to put the hatch back on and lay out the proper heights for the license plate light and tale lights. We decided on more decorative round LED tail lights and a fun vintage looking license plate light.  Both added to the retro feel we were going for with the trailer.


The lights were actually rather difficult to install.  Darrell had to cut two perfect circles in the plywood of the hatch so that they would fit tightly.  But once the holes were cut, they fit perfectly.  It was also nice to see the license plate hanging on the trailer too... one step closer!


For the hatch locking system, Darrell had the great idea to look at shed hardware.  He was able to find a great two point locking latch system that looked perfect.  As you turn the handle, it simultaneously moves two metal rods which we can be pocketed into the sidewalls of the trailer.  Many of the systems we saw utilized a chain system with I felt wouldn't be sturdy enough.  The metal rods looked much better.

Photo from www.atlanticshed.com

To install the handle, we first installed a piece of scrap oak between tow of the hatch spars to act as blocking.  then we simply drilled a hole through and screwed the handle in place so that the closed position was horizontal.  After the interior skin of the hatch is done, we can install the rods.


The back is finally starting to look complete.  Unfortunately everything has to come off before we paint the roof, but it looks great for now!

July 6, 2012

Where We Work

Though I've mentioned that we are building out trailer in the back yard and you've caught some glimpses of it and the garage in some posts, I thought it might be fun to do a short post on where we work.

Darrell and I live on the East Side of Providence, Rhode Island.  It is a pretty densely populated neighborhood with a mix of multi-family apartments and condos and single-family homes.  The neat part is that it is an old city and most of the houses were built before the 1920's... ours was built in 1900 according to the Providence assessor's database.  Though we are both itching to move back to Berkshire County where we both grew up, we have loved living here and love the area.

We were very lucky when finding our apartment that it came with parking in the two car garage behind the house.  This gives us the perfect space to store our building supplies and tools among our landlords stuff.  Though the majority of or power tools live in Darrell's trunk so they are safer and we don't have to lug them up and down to our 2nd floor apartment.

A newer photo of the garage with the trailer in it.

What the garage typically looks like.

Most of the stuff if the garage is our landlords.  Before the project we shifted some stuff around and took over five of the cubes on the shelving unit and a small bit of space on one of the lowest hanging shelves.

Supplies on the shelves and some plywood to skin the inside of the hatch.

Leftover wood and partially completed doors.

Darrell's trunk has looked like this since January!

Next to the garage is the tiny yard where we park the trailer.  We were a little worried at having it out in the open at first (we do live in a city after all) but you can't see the yard from the street and our downstairs neighbor literally parks his car in a spot blocking the yard.  We keep a hitch lock on the it, but even if we didn't, as long as he's parked there, there's no way for someone to move the trailer out of the yard.

Our tiny yard as seen from our kitchen window.


As far as protecting the trailer from the weather, we purchased an inexpensive folding canopy from Harbor Freight to provide some shelter.  We also have an enormous tarp we use to wrap everything up.  Earlier in the winter we had this tarp over the canopy to create a tent, but once the walls were up, we started wrapping the trailer instead and sometimes lowering the canopy.  Because the large tarp was rater old and a tad leaky, we also have a second smaller tarp underneath for some added protection.

Canopy

Tarp #1

Tarp #2

Done!

And that's it!  The toughest part is keeping things organized between the garage, yard, cars and apartment so that we can find things.  There is no overnight street parking in Providence, so we also have to make sure everything completely put away every night so we can fit both cars in the garage.  It definitely has its challenges, but overall our space has worked out great.  Moral of the story, you don't need a large space or dedicated garage to build your trailer.  You can build it just about anywhere!

July 4, 2012

Updates and Exterior Skin

Whew!  Sorry for the lack of updates lately, but it has been a very busy couple of weeks for us outside of the trailer build.  The whole intention of this project, which I hinted at in our very first post, was that we wanted to 'turn-about' and begin new adventures, doing what we love.  We finally set that in motion... we quit our jobs and are getting ready to pack up for the road!  It has been a bit of a whirl wind of planning and finishing up, but we're well on our way.  The goal is to be done with the trailer at the end of next week and to pack up and be out of Providence by August 1st!  So we have lots to do!

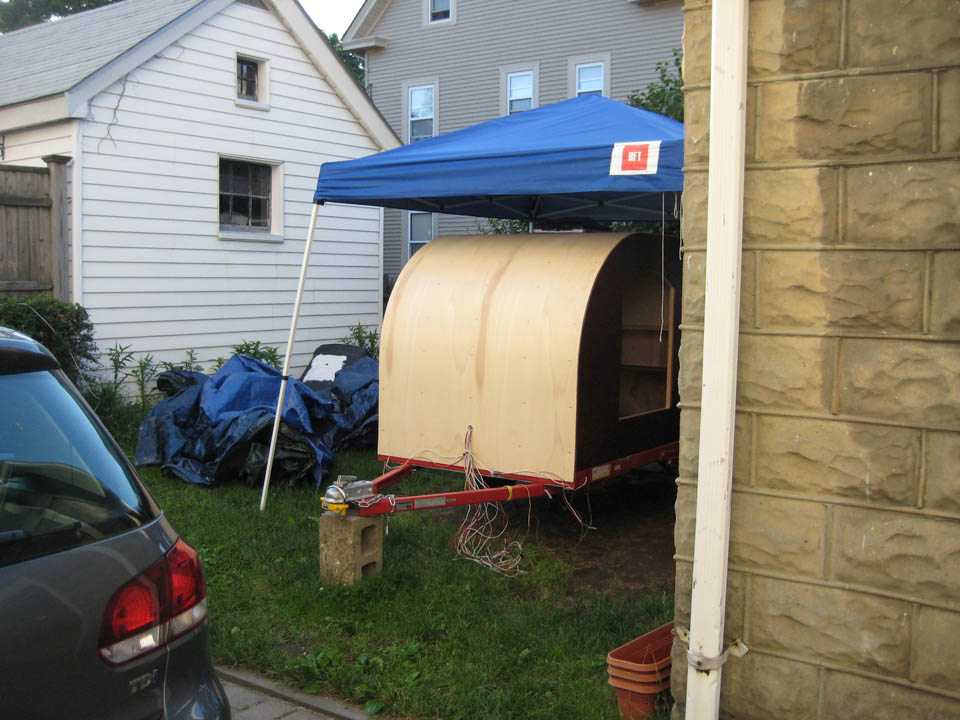
But on to some actual trailer progress.  Even though the electrical isn't completely finished, we decided since all of the wiring is run, we could still insulate and skin the main body of the trailer.  The first step was to add some additional caulking to all of the remaining gaps next to the insulation and between the metal trailer and wood floor framing.


After everything was sealed up, we also needed to corral all of the wires so they wouldn't get damaged in the bending process.


I had a mini panic attack the night before we were set to start work because I realized once the plywood was on, we would have no idea where the spars were... how would we accurately attach it?!  Then I realized if we just taped a small piece of masking tape to each spar so that it stuck out under the plywood, we would know there exact locations.  Crisis averted!


We next marked on the trailer frame, where the plywood would start.  We marked it about an 1 1/2" up from the bottom edge of the trailer frame (but for the life of me I can't remember why we did this!)  Our neighbors cat came over to do quality control at this point.  He has only three legs and is just about the friendliest cat I have ever met!  I believe his name is Curtis, but we have dubed him 'Tripod Cat'... he doesn't seem to mind :)


We used the same method of bending the plywood as we explained on this hatch post - soak the living daylights out of it and then ratchet it down into place.  This was done before insulation because we didn't want any of it to get wet.  After it was place, we admired the results and took a lunch break.


our super fun stove top toaster we got for the galley!

We decided to used recycled denim insulation for the trailer roof.  I had initially hoped to use a natural insulation throughout the trailer, but because our wall cavity was so narrow (1 1/2") foam insulation worked better.  Since we had more space in the roof, I thought we could get back to a natural insulation here, plus a fiber insulation would be much easier to install around all the wires.


With the insulation in, it was time to permanently attach the roof skin!  First, we needed to cut a hole for the wiring to pull though so we guesstimated a height to align with our future tongue box.  We strung though the wires and put the plywood back on, holding it in place with the ratchet straps after pre-wetting the outside face.  To attache it to the spars, we used 3/4" zinc coated steel construction screws (spax brand).  These worked really well since they had deep threads and we didn't have to pre-drill.  The only problem was that the zinc coating was too thick on some of the screws so that it wouldn't catch in the wood. We had to inspect each screw before using it.  To make sure the skin wouldn't move at all, we used five screws in each spar.


In the photos, it looks like we doubled up on some of the screws.  We didn't... one of those holes is screwless.  As we were attaching the plywood, we were only using the straps to hold it in place.  We started screwing spar by spar from the bottom and working our way up.  Unfortunately about four spars up, we noticed that the plywood was crooked.  Not by alot, maybe a 1/4".  However, the width of the trailer from the outside faces of the Okoume, is slightly wider than four feet.  The drip edge we will be using is 1" wide with pre-drilled holes in the center.  If the plywood remained crooked, when we screwed though the holes in the drip edge, it wouldn't catch the plywood.  So everything had to come out, be repositioned, and re-screwed.  This time we only installed two screws in each spar as we went up making sure everything stayed aligned, then screwed in the rest.  Yay for wood filler!


Since one piece of plywood wouldn't reach all the way to the galley hatch, we had decided to use two.  Before the framed opening to the fan, we had installed two spars.  So we made sure to cut the first piece of plywood to end at the first spar and started the second piece at the one next to it.  This second piece was much easier to install!


After it was all installed, Darrell carefully cut out the fan opening out with the craftsman multi-tool.


The outside skin is officially done!  Except for the finish work and paint of course :)